... about now, for later

Category: EDCI 336 (Page 2 of 3)

This is a category for the EdTech course. Please add this category in addition to the relevant edtech assignment category(ies).

Week 6: EdCamp

EdCamps are conferences where the participants see a selection of topics, and then they vote. Their vote can mean that they are interested in learning more about the topic, sharing their experiences, collaborating with others on that topic, or a combination of any of these motivations. The most popular topics are then selected and attendees can meander around and check-in on any of the discussions occurring simultaneously.

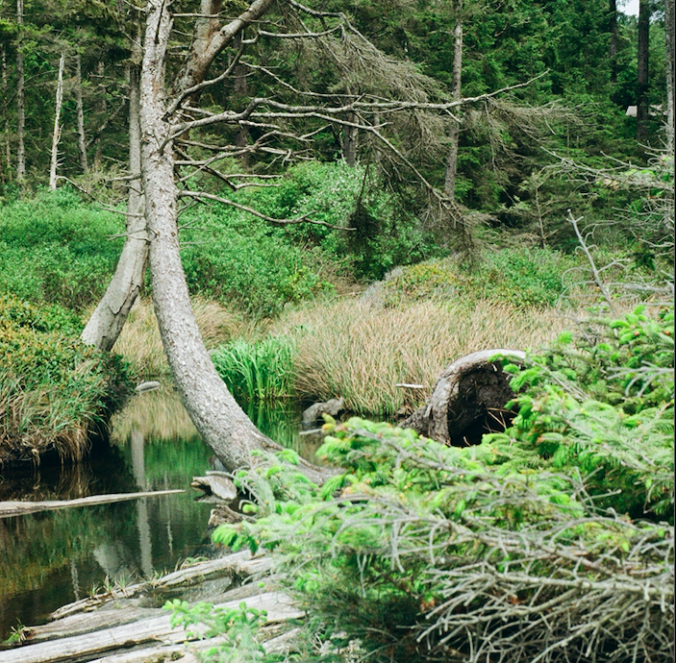
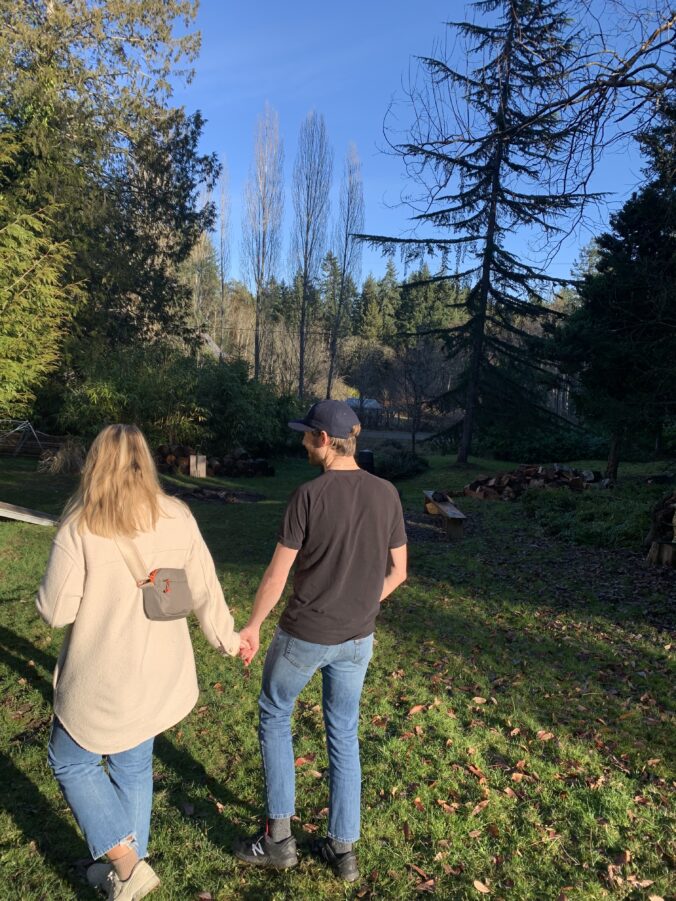
The discussion that I was a part of when we first broke into our EdCamp groups was about wild plant identification. I was looking for ideas around science pedagogy and the sharing that happened in this group proved fruitful. We were a mix of folks from both cohorts and I was happy to hear from people I don’t get to spend as much class time with. Looking at how their blog is curated—with lovely floral touches in the background and in featured images—it makes sense that Nisa had some good thoughts on connecting classroom learning with nature walks and the environment (a first degree in botany helps there too!).

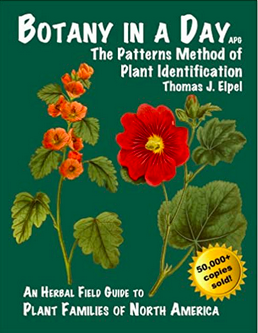
A more complete breakdown of our time together can be seen here, but I will expand on a few things that I thought sparked conversation from everyone. the book Botany in a Day was cited by Nisa as a helpful book for teachers to use themselves and share with students. From my understanding it details the world’s eight most common plant families with the goal of helping the reader easily identify new plants by looking for these marks. It is written for North America so the teacher can read to teach themselves, explore to find samples, and prepare a fun activity that can be both inside and outside the classroom.

There are many local experts that teachers can seek out as well. We discussed the possibilities of connecting with the South Vancouver Island Mycological Society to explore the fascinating world of fungi—something that could be helpful during science units.

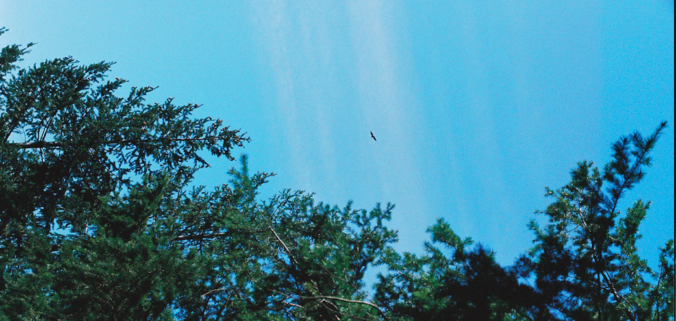
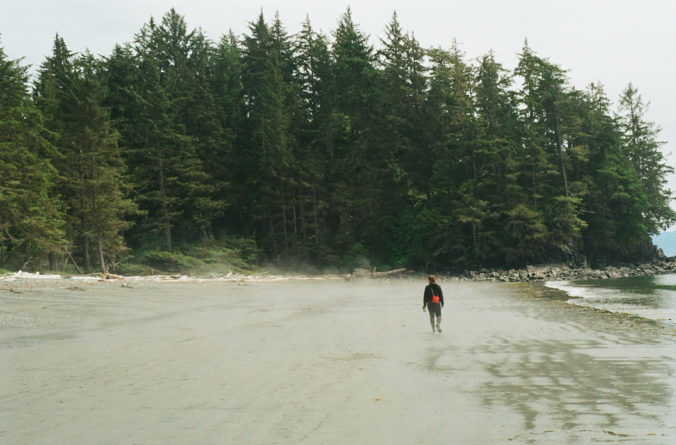
Other cross-curricular applications for wild plant identification/use could be through art. Andy Goldsworthy is an artist who uses all natural materials in creating his outdoor exhibits. The video below can definitely inspire students to see beauty in their local ecosystem that includes wild plants and other natural elements. Here, we also noted that we as educators need to link these activities to First Peoples’ ways of knowing and doing. How did First Peoples understand these plants/trees? What were they traditionally used for? and Are we collecting these materials ethically? are all topics that can stem from wild plant identification and nature talk in class.

I’ve seen nature be physically brought into the classroom as well. One teacher I observed had a decomposition box filled with worms. Students added organic waste to a box containing a soil mixture with living worms, and they were taught how nature recycles to produce its own fertilizer. Other examples are an aquarium or even some hermit crabs!

I would love to hear more about my colleagues experiences at EdCamp! I’ll be reading some weekly reflections but one cannot read every one, so please use the comment box to share some of your experiences or some more insight into topics of this blog post.

Week 5: Free Inquiry

I went to Galiano this past weekend. I didn’t get any work done, except for the type of work that doesn’t feel ‘work’—which is this project! It was a beautiful sunny weekend and I was able to set up my tripod in a green space and try out some portraits.

I don’t know if I’ve mentioned this before, but none of the featured photos on this blog were taken during this free inquiry exploration. I’ve mentioned before how film photography is an inherently imprecise art because of the greater number of variables that are under human control. Not only is it imprecise, it is also inherently non-instant. I’ll describe my process this weekend in this post, but we’ll all have to wait a couple more weeks to find out how it actually turned out.

This is the feature of my camera that I experimented with this weekend. That knob delays the opening of the shutter. Notice how when the shutter button was depressed while the knob was engaged, the aperture ring came into place and then, after the delay, the shutter snapped open and closed behind the aperture ring visible through the lens.

I took some photos of my weekend warriors. Then I used this feature to time my shots, allowing me to jump into my own film photos. Now we could just, like, take a selfie, but that’s boring compared to this! I will experiment with a head shot as well before this roll is done using this same feature.

The featured photo on this post is exactly what I took with my film camera, only taken with my phone. I used my tripod with the phone attachment (see first picture). I took the shot with my film camera and since it is not instant, I thought I’d replace the Nikon with my iPhone using the tripod attachment and take the same shot. The attachment came with a cool Bluetooth remote so I took this photo while walking away by just clicking the button. Are you looking forward to comparing the results? How do you think the composition will differ between the feature photo taken on my iPhone and the ones taken with my Nikon EM using the self-timer?

Week 5: EdTech Theories in Practice!

Sections Model by Tony Bates

SECTIONS is an acronym that can help educators evaluate the appropriateness of a technological tool they are thinking of introducing to their classroom. The tool can be used by the teacher, the students, or both. The list is intended to keep teachers accountable in the sense that they ensure the implementation is primarily beneficial for students’ learning—not just a gadget. I like the website Edutopia and I found a helpful article about How to Integrate Technology in the classroom. This article has adaptations for teachers in classrooms that have a range of tech—from one single computer to each child with a laptop—so I found it helpful. Many of the linked resources I haven’t heard of though, so I’ll have to research as a teacher and listen to Rich, our teacher, and consult with the district’s technology advisor.

A reflective question was posed by Rich in the daily schedule. Please reflect on the H5P instructional video you created: What are the strengths and weaknesses of your H5P video when evaluating it using the SECTIONS model?

It is a valuable interactive tool because a teacher can pose formative assessment questions, creating an expert – learner exchange. Blogs can also be shared among other educators for important feedback. It can be a little difficult to learn, especially for younger students, but I’m having a hard time finding other drawbacks to the H5P technology—hit the comments below if you have some thoughts.

Referencing the SAMR theory, I think many of the tools we thought of during or breakout session can allow for an equitable classroom learning environment. I think the teacher has to keep work requiring the use of specific technology in class because some students may lack the digital infrastructure at home. Powerpoint presentations displayed at the front and document camera projections can augment the learning experience and help information uptake. I think the Nintendo Switch could redefine physical and health education because it is a low impact, low risk, and enjoyable way to be active. The Switch is reviving Wii Sports and I am thrilled!! It’s expensive, but one can dream…maybe a PHE stations/centres activity?

My sketch note Feb. 11

The utility of sketch noting might not be realized instantly, and for this reason I think it can only really benefit older grades. If one is asked to draw during note taking they might be inclined to make it perfect—which is quite opposite to why sketch noting is helpful. The quick doodles mean less words are necessary and while I do agree with the scientific evidence that writing/drawing does more for memory retention than typing, I think simple arrows/diagrams/mind maps would do the trick rather than drawing a sketch of the author, a pair of boots, etc. But now that I say that, I see how my own good note taking combines non-literary elements so one can always have their own, less structured interpretation of sketch noting.

K. Berna CANVA – Feb. 11

I think CANVA is a cool tool once you fiddle with it to figure out how to use the website. The small text boxes can be difficult sometimes, but besides that I think it is a good way to allow for diverse representations of knowledge from your students. I hope you can use the all the features necessary for a developed infographic in the free version. Making a graph was simple and I see how a student could have fun exhibiting their knowledge that way.

Week 4: Digital citizenship

Our task this week was to create a green screen video and a slow-motion edit. I tried my best to download the videos first on a university computer and then on my iPhone and use iMovie to create these, to no avail. I produced a simple video in my free inquiry blog post, where I shot and edited video, as well as added photos and a title.

In my attempts to create the videos for the activities I did check out various creative commons websites in search of materials. We explored creative commons websites like Unsplash for freely-usable images in previous classes and I find sites like this useful because it can add to teacher communication and student exhibits of learning. A classmate reminded me that educational commons are useful for teaching/lesson ideas and I agree with them—these types of internet forums are something I see myself frequenting as a teacher.

In attempting to use video creative commons websites, however, I did not see the same immediate value. I found Archives.org to be very distracting. I think video creation could be a valuable tool, absolutely; I loved making my video and students could definitely show their learning that way. That’s they key—with their own media, rather than something found online.

The primary in-class activity this week (Week 4-Q&A with Jesse Miller) was very valuable. Here are some thought on the questions from this week:

Will you change your use of social media after the talk and Q&A with Jesse Miller? Yes. I have never have been one to post debatable content online, so I will change my social media use by trying to connect with others. Linking to another question about what I found googling myself (my long forgotten LinkedIn profile), I intend to use social media for its primary (boring?) purpose. LinkedIn has expanded to become a kind of professional Facebook and I like the update; my friends are sharing stories that I want to interact with and Twitter has already become daily source of teaching inspiration. Math Twitter is definitely a rabbit hole I never thought I would be going down…

How can we help our learners manage their digital footprints? I resonated with what Jesse said about having conversations about kids’ digital day, in addition to their …analog day. Well, that doesn’t really exist anymore, and that’s the point. As adults and models for young students, we have to be realistic about the fact that kids have an online life and be supportive. These interactions can help older students consider their digital presence if they have social media applications, and younger students to build their fund of knowledge about the online world before they begin to use the technology by themselves.

I have to get better about my tendency to divert conversations with kids away from tech. I exhibit a dinosaur mentality when I act like I don’t care. Instead, talking about it provides common ground for students to relate to their teacher. For my loyal readers I have a final question: What’s the piece/aspect of technology that you have the most experience with and how do you envision transitioning this knowledge into the classroom?

Free Inquiry: Week 4

My above view filming set-up

I am ready to start shooting some photos! I used my tripod for the first time, but what was mounted on it wasn’t even my film camera…Instead, it was the phone holster I purchased; an attachment that screws into the same 1/4″ hole that holds my EM, and can be used to take portraits or videos requiring the phone to be stationary. I got it exactly for this purpose and I am so happy to say that I succeed in making a short video about how to load my film camera.

I watched similar videos when I was learning how to load film myself, and I have watched others that have helped me learn how to draw graffiti. I found the bird’s eye view to be very helpful. I set up a little space by my place that had a lot of natural light and pressed ‘record’. With this video—and some helpful for pre-shoot essentials detailed in my last post—someone with a Nikon EM or similar single-lens relflex (SLR) film camera should be equipped to begin the journey of film photography!

I created a YouTube channel and posted my first video!

I used iMovie to edit this video and did it all on my iPhone. It was a very fun experience and turned out to be much easier than I anticipated. I thought it was very neat that iMovie lets one include photos and video clips within the movie; for the photo in the title sequence, it even put in cool fade effect by itself. I was able to easily make a simple title and transition into my clip. I did it all in one take so I didn’t have to do too much editing, but next time if I have to I’ll be more comfortable.

I think I could have done a better job showing how to get the film into the slot of the advance roller (3:00 – 3:11). I was looking at my phone the whole time to make sure I was getting everything in the frame, but since that’s the most precise part of the loading process I must have been focusing a bit too much on my work rather than how it was appearing in the video.

Next week, I think I’ll do another video about how to use the self-timer feature on the film camera and take a head shot. Happy shooting!

Pre-shoot: aperture, focus and shutter speed

The first film photos I ever took were not of publishable quality, but I told myself that film photography is an inherently imprecise art and that I should be happy with whatever outcome. I am lucky to have a friend who has been a guide throughout my few years of shooting film and just as he tutored me about these three integral components of film photography, I will try to impart some of that wisdom in this blog post.

Shutter speed: This is a setting to control how fast the shutter opens/closes to let the light into the compartment containing the light-sensitive film. For more on the shutter’s location in the camera, see the video embedded in my first inquiry blog post. After your film canister is loaded into the camera and before you take and pictures, make sure to set the ASA dial to the film speed labelled on the packaging. For the film I am about to load, I will set it to 400.

400 ASA is the film speed, or the film’s sensitivity to light. This film speed is recommended for general, all-purpose photography, which I why I have used it for most of my shooting (along with black & white occasionally, which I have found even more forgiving). My Nikon EM was designed for novice photographers, so this is really the only crucial setting that the user must be sure to fulfill before taking any photos.

Aperture: The smaller the f-stop number, the larger the opening. The higher the number, the smaller the opening. A large opening means more light gets into the camera; so if I was shooting in bright daylight, I would select a large number (a higher f-stop, say f/22). My Nikon EM operates on aperture priority mode; it is a semi-automatic film camera that has a light meter and a battery, automatically adjusting the shutter speed to get the correct exposure. The EM manual describes this best. When looking through the viewfinder, the user will see a shutter speed scale on the left. Numbers correspond to fractions of a second, or how long the shutter remains open to expose the film to light 1000=1/1000 sec.

Excerpt from Nikon EM Owner’s Manual

The red numbers on the bottom and the red zones indicate over or under exposure. What comes next here really shows how the EM is a beginners camera. The user can depress the shutter release button halfway down. That’s right, careful not to push it all the way down which would snap a picture, but just halfway to engage the mechanical aspects of this film camera.

This is the light meter, which will determine the correct aperture you need to use to get the optimally exposed shot. The camera will actually beep to warn the user if they are set to over-exposure. Toggle the lens aperture (in the above photo, mine is shown with the white dot, f/16) to stop the beeping. As you change aperture, the needle (#4 in above viewfinder diagram) will move up or down the shutter speed scale. Stop when you have selected an aperture that makes the needle stop as close as possible to the film speed that is loaded in your camera. Then . . .

Focus: This is the final piece. Turn the focus ring until the image in the field of the viewfinder appears sharp. If you’re shooting something close to you, the outer field (#7) should be sharp so that your subject appears on film as clearly as possible. The lens focusing ring can be seen in the picture of my camera above. The numbers above the f-stops are related to the focusing ring and should align with how near or far away the user is from the subject/object. This is the most natural part of the process since it is easier to see if your shot will turn out fuzzy or not; conversely, if the aperture is off your photo will be too bright or dark.

EM Owner’s Manual

Screencast video—a review

Screencastify is a Chrome plug-in that allows a user to record the actions on their screen. Once we made a video using this plug-in we used a tool on WordPress to make the video interactive. I was using the Pearson companion website the other day to explore the many resources to go along with the chapters. With this in mind, I thought I’d use today’s class time to make a tutorial about how to find, view and download all of the helpful activities.

I think this H5P tool is super useful. As I use WordPress more, I can really see how a blog is a medium I could use as the teacher for a the class website. I would love to hear any considerations to keep in the comment section.

I find it particularly useful for posting assignments. The text can easily link the students to the sources that you intend they use for the assignment. You can format the assignment post to create a checklist that they can use to ensure they have covered everything required. I’m envisioning an assignment about research on an animal, requiring pictures to support the characteristics. One thing that I have had trouble with in the past is how to wrap text around picture in word documents. I have found this tutorial helpful. As Rich was saying in class, I could embed this video in my assignment blog post or I could make my own!

Combining the Screencastify with H5P is especially useful. I see myself making a PowerPoint for a lesson and narrating the slides with the audio tool. This makes it easy to pre-record a lesson, which could be super convenient in case of emergency, to help a TTOC, or if I would just like to try it out. Slides will have few words and helpful images—to align with the Multimedia Learning Theory—so students can listen to my voice without being distracted. I can share the lesson with my students via email or Google Classrooms and play it in real time in class, letting the video do the instruction. This gives me to ability to make sure they are paying attention and understanding the information; I can pause anytime to chat with the students in class. Then, by using the multiple choice feature I can formatively assess my students in the middle and at the end of my presentation—super cool feature.

Computer by Cahya Kurniawan from NounProject.com

Screencasting seems like it would almost be essential for a flipped classroom. A flipped classroom is where the primary instruction material is delivered beforehand, accessed and viewed by students on their own time prior to arriving in that class. A flipped classroom has the potential to optimize classroom learning and time allocation. For it to function properly, however, students must take responsibility for their own learning. Along with this motivation, a flipped classroom requires students have quality digital infrastructure at home to support this process.

Film photography

One of my hobbies is taking photos with my Nikon EM90, a 35mm, SLR (single lens reflex) film camera. I know enough about photography and the specifics of my camera to take shots of basic scenes with good lighting. I will use this inquiry mostly to learn how to utilize all the features of my specific camera, and to explore in detail the basics of film photography and the effects of different film types or lenses.

I am excited to begin this journey and have set out a preliminary outline of the topics I would like to research.

  • What do I need to know about aperture so that I can get the best quality shots?
  • How does my practice change if I attach a flash?
  • What changes to the camera’s settings will I have to make if I want to shoot moving targets as opposed to still scenes?
  • I have a new tripod I want to try, and I will be making a how-to video about setting it up with the camera.
  • Can is there a timer on my camera? If so, can I use it to take self portraits with my tripod and how will they look?
  • How is film developed? What is the difference between developing black & white as opposed to colour film? Is there a space at the university where I can try it out?
  • How does one scan the negatives to digitize them? I have a friend (who got me into film) who has a scanner, and I would like to try it out and document the process.

For now, I will leave you with this video that explains a single lens reflex (SLR) camera.

Education: an evolving system

A fruitful discussion during our first breakout session with our newly formed learning pod yielded several points that our cohort of teachers-in-training believe are important to continue evaluating as we move through our coursework, practica and career.

First, we understand that the education system as a whole (including K-12 and university) is made up of checkpoints. Elementary education provides a baseline, high school students accumulate a breadth of “knowledge” in the form of test scores, which they then use to apply to a university, achieve a degree, and transform that into a job in whatever field.

Our thoughts about re-imagining education come from the movie Most Likely to Succeed (2015). One thing that our learning pod recommends is more funding. We referenced mostly students supports like counselling, occupational and physical therapy, reliable education assistant staffing and food programs, and we also acknowledged how more technology in the classroom could benefit student learning. About the human resources in the above list, we felt these to be important because with greater staffing, there can be a definition of roles and therefore accountability. With the right supports for students who need it, teachers can have more time to plan and execute inquiry or project-based learning opportunities, which could require more back-end/scaffolding work by the instructor before asking students to organize their own learning.

Photo by Julia M Cameron from Pexels

Our learning pod noted that although high school allows more flexibility in instruction and assessment because students can manage with less guidance, we thought greater staffing would give allow for trail and error of these re-imagined learning opportunities. This leads to a reflection on another major topic of this week— professional learning networks.

I have just joined the Twitter-verse and I don’t regret it. Through following a few local educators I’ve already been linked to other accounts, blogs or simple little GIFs that I believe will be useful as I start to lesson plan. As I move through this degree and meet various teachers, administrators and educators I will be sure to share my contact and social media account(s) information so I can build my professional learning network to gather and implement some tested teaching methods. In addition to getting inspiration, building a PLN and utilizing creative commons is also a way for teachers to self-reflect—a practice that will need to be exercised frequently to keep students motivated.

Take two

this time around

i’m doing my best to spend time producing work i let marinate.

ideas that have soaked up my intuition,

my goals, my dream, and my apprehensions.

making myself stop to consider:

are these words something i intend to manifest within the walls of some future classroom?

i still kick a ball around;

it’s what keeps me fresh.

a clean slate, after a few hours on the pitch on a cool, winter evening

attacking, expressing, supporting, defending,

my goal:

treat class like a team:

communicate,

form relationships,

and build each other up.

to create,

like in the beautiful game,

where a result—

a product—

is less important than the effort

the struggle,

the process, in which all students engage

« Older posts Newer posts »