... about now, for later

Category: Free Inquiry

This is the category to apply to your Free Inquiry posts.

Free Inquiry: Week 10

Thank you!

To Rich, our professor of Technology Innovation in Education. He has provided us valuable experience with digital tools and ethical debates about the implementation of tech in the classroom. As well, he has crafted this enjoyable project that spurred me to improve my practice of film photography, and make videos that could help others getting into film by making it a little less daunting.

And I cannot forget my readers! Your comments online and in-person spark fun conversations and help me stay motivated. Thank you.

Mystic Vale – concrete in nature

Growth

Through this inquiry, most immediately I’ve learned that a blog is a good way to display learning that involves multiple media. I made videos, wrote creatively, and posted some film photos all within WordPress . This project motivates me to craft projects and inquires in my teaching career that can be displayed through this personal shareable site.

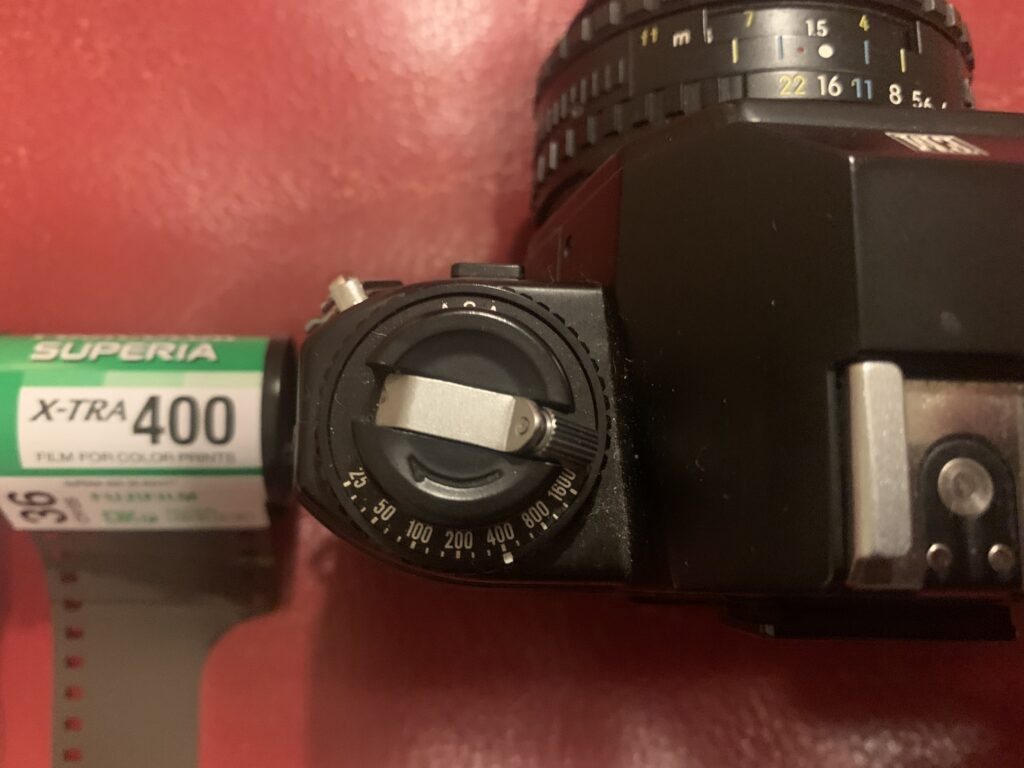
More specifically about film photography, I first learned how the film speed displayed on the roll connects to my shutter speed and aperture. When setting up for shots, I think I was consistently setting my film speed as lower than what was actually in my camera. This can effect the image captured, and I’m very happy that I made a point of doing my second inquiry blog post on that function because it made most of my inquiry roll usable shots (34/36).

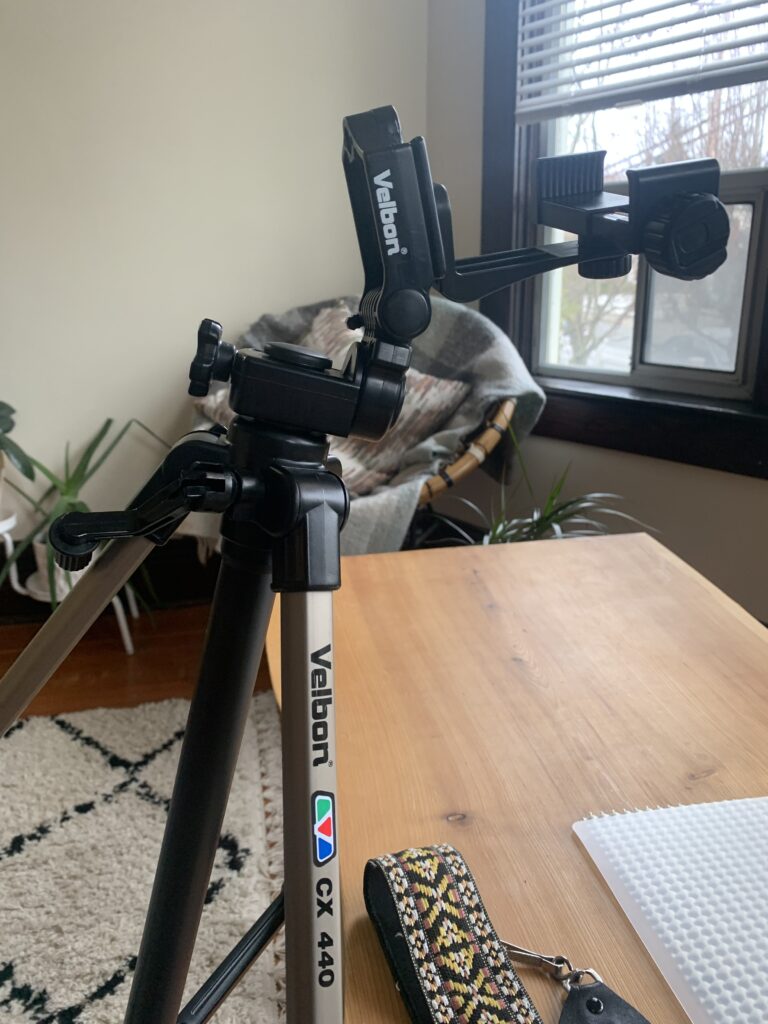
I learned how to use my self-timer! This isn’t super complicated but I had never tried it before, so this inquiry project evidently motivated me to try something new! I also used my tripod, which had previously collected dust in a closet before this adventure.

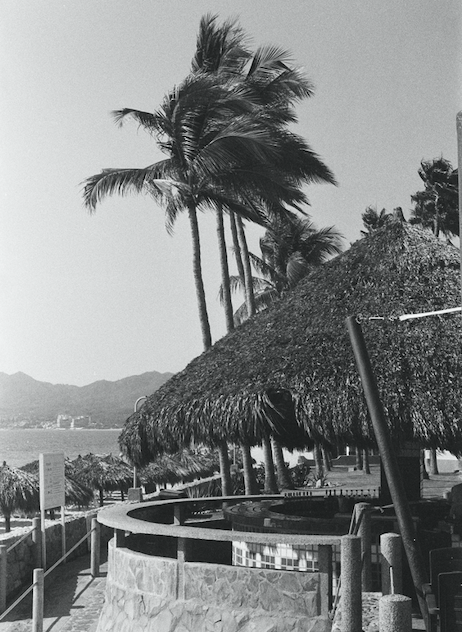
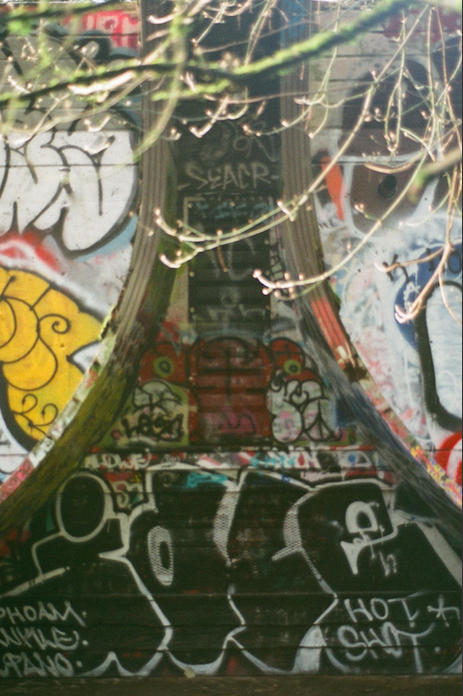
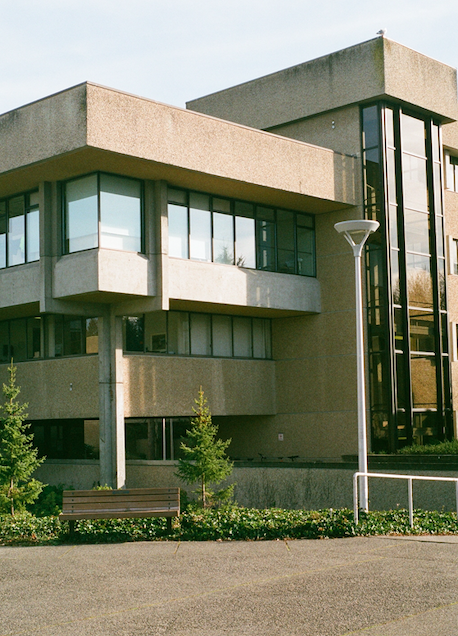
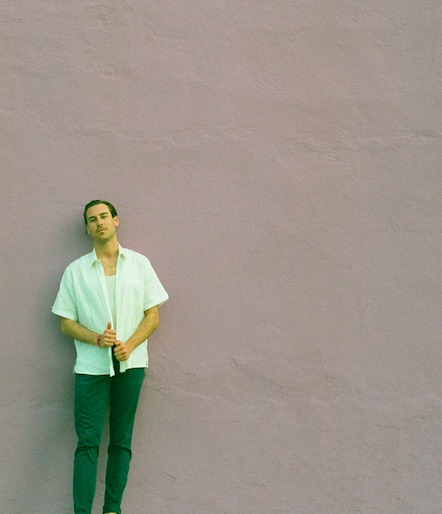
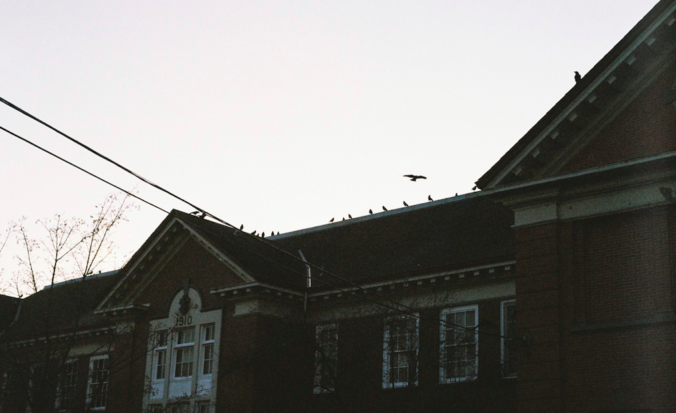
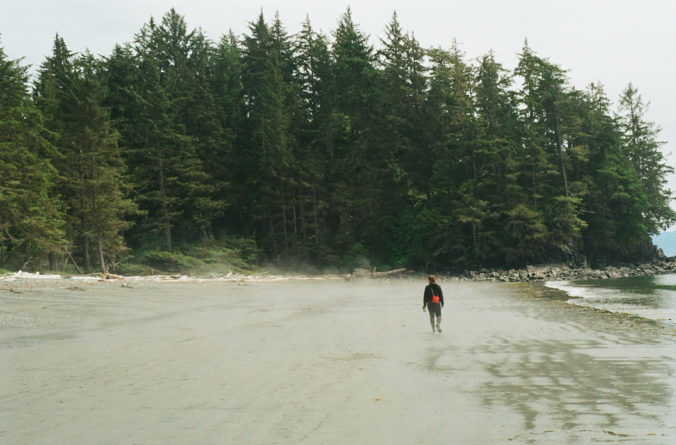
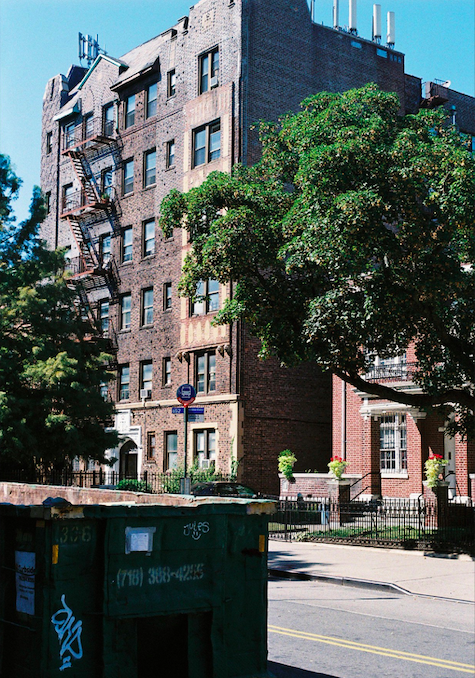
I also worked on my style as an artist. By committing to taking different types of shots in week 6, once the roll got developed, I had a variety of photos that act as tangible evidence of learning throughout the term. Making and following a plan and witnessing the results was an empowering as a photographer! I consider myself more than a novice now.

https://www.zippi.co.uk/thestudio/manual-photographers-cheat-sheet-infographic/

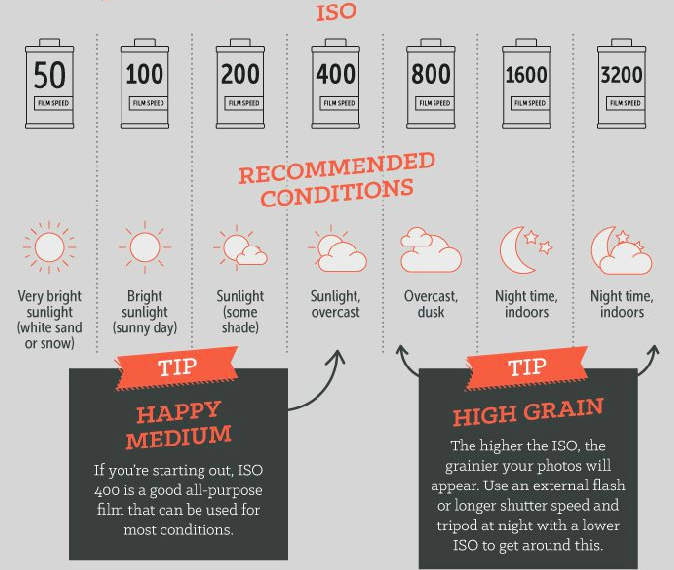
Finally, this inquiry has challenged me. Moving forward, I want to tailor the film I load into my camera to the situation that I plan on capturing. This is another level of planning, because I will not be able to remove roll once it’s loaded. I want to try shooting at night, therefore requiring a higher film speed with greater light capturing ability (see above). I have never done this and I am very curious to try and see the results. Maybe I’ll get an external flash and look the part.

As I stated in the above video I made, film photography isn’t completely new. Taking an academic approach to studying my process however, made it a completely different experience. I was shooting with a goal of making neat blog posts, not just catchy Instagram photos . . . I mean, I will post them on social media though, because I like likes. Follow me @kevychase_ on Instagram if you’ve enjoyed following my Free Inquiry!

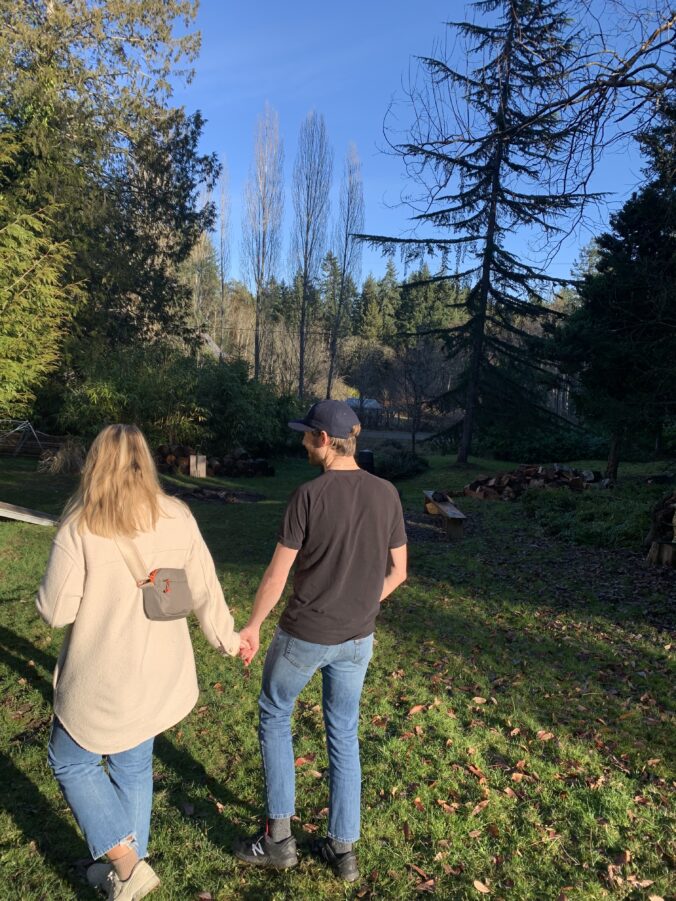
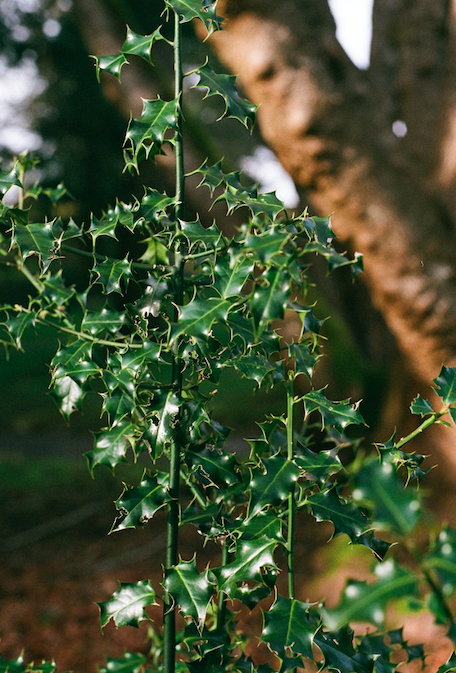
Infused in this final post are a few more pictures I’ve taken in 2022 while I’ve been engaged with this project. I think the close up holly is a beautiful photo—the lighting and my focus setting was perfect to show the sharp edges of the leaves. I’m proud of that one, taken without a zoom lens. Also, the black and white photos taken at the Kinsol Trestle are beautiful. I had no specific plans, but I was pleasantly surprised to see how well the fog was captured on B & W film.

Week 9: Inquiry photo dumb

In this week’s penultimate Free Inquiry post, I will show off some photos that I took with that roll of film that I loaded (and unloaded). I will also connect some of my goals for composition—detailed in my Week 6 Inquiry post—to the photos below.

Self-timer

This was a good challenge. Here was my process for taking a self-timer shot. 1) Ask a friend to stand at the distance away from the camera that I would be standing for timed shot. 2) Focus my lens so that subject appear clear in viewfinder. 3) Mark that spot with a stick, ask friend to move, set timer on my film camera, and walk toward the stick and plan to reach that spot as the timer was going off/be ready for the flash (I took two timed shots, one walking away and one towards camera).

This (timed!) walking away photo that I find almost inspirational turned out quite well. It doesn’t differ drastically in terms of clarity to the feature photo in my Week 5 blog post taken from behind with my iPhone. Obviously it’s much brighter, but that’s Apple v. 1980s Nikon technology.

It was close because the exposure is right; I’m definitely letting the right amount of light into the camera and I am being hit by the sun’s rays, an ideal position for the subject. I would be able to be seen clearly if I had my focus right, adjusting the focus knob to match how far away I was standing from the lens.

Repetition and symmetry

One of my main goals stated at the end of my week 6 post was to use repetition and symmetry in photo composition.

I was wandering around campus and found this utility box. I found it difficult to get truly up close to a pattern that I found interesting and I realize that some of the examples I saw must have been taken with a zoom lens, which is more effective at filling the whole frame homogeneously.

This is a graffiti’d wall in Mystic Vale. I had to edit this photo; I must have taken it from the side not noticing, because it was off-centre post developing and therefore not truly centred to show symmetry. I edited it on my iPhone because I was having trouble doing it on my computer and I remember doing a simple edit for an Instagram photo to tilt it straight. It still looks like it was taken at an angle, but taking a symmetrical photo and editing are two skills I can use in the future.

Below, a neat depth of field photo of a cluster of trees at the edge of Ring Road. I have another like photo that I’m saving for next week too, stay tuned.

Lines

I like capturing cool lines and shadows in my film photography. Here are a couple from this Inquiry roll. Below, a fun brick wall depth shot with shadows crisscrossing. I think the last one one looks like it came from an admissions catalogue in the 80s when the Nikon EM was the best camera available.

Below: “The Clearihue Building, conveniently located across the way from the cafeteria, so you can fetch one last bite before locking yourself in a study room for the night.”

Thank you for following along for the last couple of months. I will be using this blog for fun in the future. As always, please share any thoughts about this post and other in the comments and I will have one last review of this inquiry to share next week!

Week 8 Free Inquiry: Happy Accidents

I have many examples of photos that didn’t turn out when developed, and I will try my best to diagnose the cause. I remember being annoyed that some scenery shots were too dark or otherwise compromised, but I also have a few examples of photos that I love precisely because they have a mark that is unique to my camera. This resource helped my figure out what was wrong, and still helps me to this day.

I was in New York a couple of years ago and I felt like a true artiste toting around a film camera as I strolled through Manhatten and Brooklyn. Once I returned and had the film developed, I knew I had to 2) figure out my shutter speed and 2) repair my camera to stop light leaking in. Here are two photos show the issues.

Shutter speed too fast

So this was supposed be Central Park, but all you see are some tree tops. The black bar at the bottom is actually my shutter. I must have set the shutter speed too high and it was coming back to resting position before the film was fully exposed.

Light leak

Notice how on the foot of the photo on the right there is a faded beam of light extending from the edge of the frame. That is because light is leaking into the back of the camera. The next photo below is a hot mess of both of these malfunctions. However, since this is a mural of ODB’s Return to the 36 Chambers album cover in his hometown of Brooklyn, NY, and considering the raunchy style of the album, I think this is a great photo—10/10.

Flare

Lens flares are also a neat part of photography, not only film but digital as well. They occur when light is reflecting and refracting within the lens, usually because the photographer is pointed towards the sun and the light is a little too much for the camera to handle. I try my best now to shoot with my back to the sun; since I had the foam replaced in the film door of my camera to prevent light leaking in, more of my recent photos are mark-free. (See final photo at the end of this post).

Did not match film speed with scene brightness

The above recommended film speed for each condition is from a handy source that I used for my composition blog post as well. I took this picture (below right) in Mexico during a winter getaway (yas) and I realize now that 400ISO was not ideal because it was very bright and sunny; I think I overexposed many of my shots. The higher the film speed, the more light gathering ability the film has, so I should have been using a lower ISO (100-200, instead of 400).

It didn’t help here that I was shooting directly into the sun—I should have been setting my subjects so that the sun was shining on them, rather than on me—but I think I should have planned to bring a lower ISO to Mexico. I guess I’m just used to shooting the cloudy PNW. Although, a couple of photos did turn out amazing if I may say so (see one example below). And I think I know why. This one was shot at dusk with the sun providing the most indirect, natural light. The background is a nice contrast as well; I wonder if that makes a difference?

Scanning error?

This is a neat photo I took a while ago and it has a very unique mark that isn’t visible on any other photo I’ve taken. Down the right side of this photo appears to be a sort of fissure, almost like the film is splitting apart. I still have no idea what caused that, if anyone reading this has any ideas please leave a reply in the comments.

My camera is repaired and recent rolls have been free from light leaks. I enjoy snapping pictures in Victoria; I really like the colours of this Coastal First Nations art that is permanently displayed in front of the Royal BC Museum downtown.

Week 7: Unloading film

I tried a new set-up for my point of view style filming. I found it much more comfortable to see what I was doing while making sure it was all visible on video—I hope you enjoy it! Also, sure, it’s lots of me talking; however, I am very proud that I successfully added a cute lil’ audio clip to the title sequence! I think in all, I can say that I’m becoming more confident composing video tutorials.

I have just made a video about how to take film out of the camera. The process of developing film is arduous to say the least. ‘Developing’ in the context of photography means chemically treating exposed film (film that has been exposed to light via the opening of a camera shutter) to make the pictures imprinted on the material visible, while avoiding over exposure. Here is an expansive article on the subject, as well as a Youtube video that shows the amount of materials and steps needed.

I know what you’re thinking, wow, these folks are passionate! Truth be told, I don’t believe I will ever do this myself. But it’s interesting to learn about. There’s a hashtag that I’ve seen used on Instagram before—#shootfilmstaybroke. Tally up the cost of the film itself (before shooting), and the labour cost associated with having someone develop your film, scan the negatives to convert them into a digital file, and upload them to a file sharing space, and you’ve got yourself a nice (solo) dinner out and a good tip for the staff.

One thing I might invest in is a scanner for the negatives—what the film is called after being developed. That way I can accumulate a bunch of roles with pictures that aren’t required urgently for a blog post, still bring them to a third party to be developed all at once, but then take my time scanning the negatives. I’m really enjoying another project I’m doing with my hands that I’ve posted on Twitter, so I can see myself scanning my own photos too.

I’ve rambled on enough. Next week I’ll post about what I referenced in my video, how light leaks and scanning errors can affect the final product.

Free inquiry wk 6: Shot composition

Hello readers! I am still going through the 36-shot rolls of film. Sometimes it is hard to find time to shoot because carrying a film camera around isn’t always easy. I definitely don’t take it out if it’s raining because film cameras—or any camera, probably—do not like water! Sometimes I just have a bag or some other personal object in my hand, so stopping to put my things down while I take a photo kind of makes it a chore. And, finally, doesn’t everyone wish they had all the time in the world to engage with a fun hobby?

Photo by Ben White on Unsplash

As I continue to shoot, I will try use this resource to compose my photos. Doing this will ensure that I have good variety and will help make the most of every roll. I find that as I look through my collection of past photos, I like capturing landscapes rather than an isolated subject. I think I have a good concept of the framing my shots, and I can reference a picture in my archives.

Here I am in False Creek looking towards the Granville St. Bridge in my hometown of Vancouver. Like the article suggests for framing, I think I did well here to capture objects outside the water and frame the centre of the scene, so that the viewer’s eye is drawn to the bridge as the focal point.

I think this is a good example of using the rule of thirds, which is the primary tip in the article. This rule states that a photographer should position the important elements of the shot along the lines dividing the scene in thirds (see image in article for visual of this). I love the way the clouds appear in my photo above. They define the top third of the image, leaving the outcropping of rocks to define the middle, and the waves the bottom third. Then my eye is drawn to the driftwood and the ship in between and around these natural divisions.

Another resource I found advocates for a diversity of shots. See the ‘Step 3: Take your shot!’ in this article to see what I mean. In my coming roll I want to try an example of repetition, where the whole frame is filled with a pattern. I’ve never thought to get up close and personal with a cool pattern or texture, so I’m curious to see if I can capture that well. Comment if you know some good locations in Victoria to capture and I’ll see if I can make it happen!

Week 5: Free Inquiry

I went to Galiano this past weekend. I didn’t get any work done, except for the type of work that doesn’t feel ‘work’—which is this project! It was a beautiful sunny weekend and I was able to set up my tripod in a green space and try out some portraits.

I don’t know if I’ve mentioned this before, but none of the featured photos on this blog were taken during this free inquiry exploration. I’ve mentioned before how film photography is an inherently imprecise art because of the greater number of variables that are under human control. Not only is it imprecise, it is also inherently non-instant. I’ll describe my process this weekend in this post, but we’ll all have to wait a couple more weeks to find out how it actually turned out.

This is the feature of my camera that I experimented with this weekend. That knob delays the opening of the shutter. Notice how when the shutter button was depressed while the knob was engaged, the aperture ring came into place and then, after the delay, the shutter snapped open and closed behind the aperture ring visible through the lens.

I took some photos of my weekend warriors. Then I used this feature to time my shots, allowing me to jump into my own film photos. Now we could just, like, take a selfie, but that’s boring compared to this! I will experiment with a head shot as well before this roll is done using this same feature.

The featured photo on this post is exactly what I took with my film camera, only taken with my phone. I used my tripod with the phone attachment (see first picture). I took the shot with my film camera and since it is not instant, I thought I’d replace the Nikon with my iPhone using the tripod attachment and take the same shot. The attachment came with a cool Bluetooth remote so I took this photo while walking away by just clicking the button. Are you looking forward to comparing the results? How do you think the composition will differ between the feature photo taken on my iPhone and the ones taken with my Nikon EM using the self-timer?

Free Inquiry: Week 4

My above view filming set-up

I am ready to start shooting some photos! I used my tripod for the first time, but what was mounted on it wasn’t even my film camera…Instead, it was the phone holster I purchased; an attachment that screws into the same 1/4″ hole that holds my EM, and can be used to take portraits or videos requiring the phone to be stationary. I got it exactly for this purpose and I am so happy to say that I succeed in making a short video about how to load my film camera.

I watched similar videos when I was learning how to load film myself, and I have watched others that have helped me learn how to draw graffiti. I found the bird’s eye view to be very helpful. I set up a little space by my place that had a lot of natural light and pressed ‘record’. With this video—and some helpful for pre-shoot essentials detailed in my last post—someone with a Nikon EM or similar single-lens relflex (SLR) film camera should be equipped to begin the journey of film photography!

I created a YouTube channel and posted my first video!

I used iMovie to edit this video and did it all on my iPhone. It was a very fun experience and turned out to be much easier than I anticipated. I thought it was very neat that iMovie lets one include photos and video clips within the movie; for the photo in the title sequence, it even put in cool fade effect by itself. I was able to easily make a simple title and transition into my clip. I did it all in one take so I didn’t have to do too much editing, but next time if I have to I’ll be more comfortable.

I think I could have done a better job showing how to get the film into the slot of the advance roller (3:00 – 3:11). I was looking at my phone the whole time to make sure I was getting everything in the frame, but since that’s the most precise part of the loading process I must have been focusing a bit too much on my work rather than how it was appearing in the video.

Next week, I think I’ll do another video about how to use the self-timer feature on the film camera and take a head shot. Happy shooting!

Pre-shoot: aperture, focus and shutter speed

The first film photos I ever took were not of publishable quality, but I told myself that film photography is an inherently imprecise art and that I should be happy with whatever outcome. I am lucky to have a friend who has been a guide throughout my few years of shooting film and just as he tutored me about these three integral components of film photography, I will try to impart some of that wisdom in this blog post.

Shutter speed: This is a setting to control how fast the shutter opens/closes to let the light into the compartment containing the light-sensitive film. For more on the shutter’s location in the camera, see the video embedded in my first inquiry blog post. After your film canister is loaded into the camera and before you take and pictures, make sure to set the ASA dial to the film speed labelled on the packaging. For the film I am about to load, I will set it to 400.

400 ASA is the film speed, or the film’s sensitivity to light. This film speed is recommended for general, all-purpose photography, which I why I have used it for most of my shooting (along with black & white occasionally, which I have found even more forgiving). My Nikon EM was designed for novice photographers, so this is really the only crucial setting that the user must be sure to fulfill before taking any photos.

Aperture: The smaller the f-stop number, the larger the opening. The higher the number, the smaller the opening. A large opening means more light gets into the camera; so if I was shooting in bright daylight, I would select a large number (a higher f-stop, say f/22). My Nikon EM operates on aperture priority mode; it is a semi-automatic film camera that has a light meter and a battery, automatically adjusting the shutter speed to get the correct exposure. The EM manual describes this best. When looking through the viewfinder, the user will see a shutter speed scale on the left. Numbers correspond to fractions of a second, or how long the shutter remains open to expose the film to light 1000=1/1000 sec.

Excerpt from Nikon EM Owner’s Manual

The red numbers on the bottom and the red zones indicate over or under exposure. What comes next here really shows how the EM is a beginners camera. The user can depress the shutter release button halfway down. That’s right, careful not to push it all the way down which would snap a picture, but just halfway to engage the mechanical aspects of this film camera.

This is the light meter, which will determine the correct aperture you need to use to get the optimally exposed shot. The camera will actually beep to warn the user if they are set to over-exposure. Toggle the lens aperture (in the above photo, mine is shown with the white dot, f/16) to stop the beeping. As you change aperture, the needle (#4 in above viewfinder diagram) will move up or down the shutter speed scale. Stop when you have selected an aperture that makes the needle stop as close as possible to the film speed that is loaded in your camera. Then . . .

Focus: This is the final piece. Turn the focus ring until the image in the field of the viewfinder appears sharp. If you’re shooting something close to you, the outer field (#7) should be sharp so that your subject appears on film as clearly as possible. The lens focusing ring can be seen in the picture of my camera above. The numbers above the f-stops are related to the focusing ring and should align with how near or far away the user is from the subject/object. This is the most natural part of the process since it is easier to see if your shot will turn out fuzzy or not; conversely, if the aperture is off your photo will be too bright or dark.

EM Owner’s Manual

Film photography

One of my hobbies is taking photos with my Nikon EM90, a 35mm, SLR (single lens reflex) film camera. I know enough about photography and the specifics of my camera to take shots of basic scenes with good lighting. I will use this inquiry mostly to learn how to utilize all the features of my specific camera, and to explore in detail the basics of film photography and the effects of different film types or lenses.

I am excited to begin this journey and have set out a preliminary outline of the topics I would like to research.

  • What do I need to know about aperture so that I can get the best quality shots?
  • How does my practice change if I attach a flash?
  • What changes to the camera’s settings will I have to make if I want to shoot moving targets as opposed to still scenes?
  • I have a new tripod I want to try, and I will be making a how-to video about setting it up with the camera.
  • Can is there a timer on my camera? If so, can I use it to take self portraits with my tripod and how will they look?
  • How is film developed? What is the difference between developing black & white as opposed to colour film? Is there a space at the university where I can try it out?
  • How does one scan the negatives to digitize them? I have a friend (who got me into film) who has a scanner, and I would like to try it out and document the process.

For now, I will leave you with this video that explains a single lens reflex (SLR) camera.